What’s Orikeshi?
The word “Orikeshi” is a combination of the Japanese word for eraser (keshigomu), and “original”. As the name implies, it’s a series of DIY craft kits made by Bandai that let you make your own pixel art erasers in your microwave!
Ever since I learned about Orikeshi, I’ve always wanted to try it out, and I figured doing a product review would be the perfect opportunity!
While testing out Orikeshi, I learned a few tips and tricks that are essential to making good-looking and well-functioning erasers, so read on to find out more!
First Things First – The Materials
First, let’s take a look at the materials that come with Orikeshi kits. I’ll explain how all of these pieces work together later, so don’t worry!
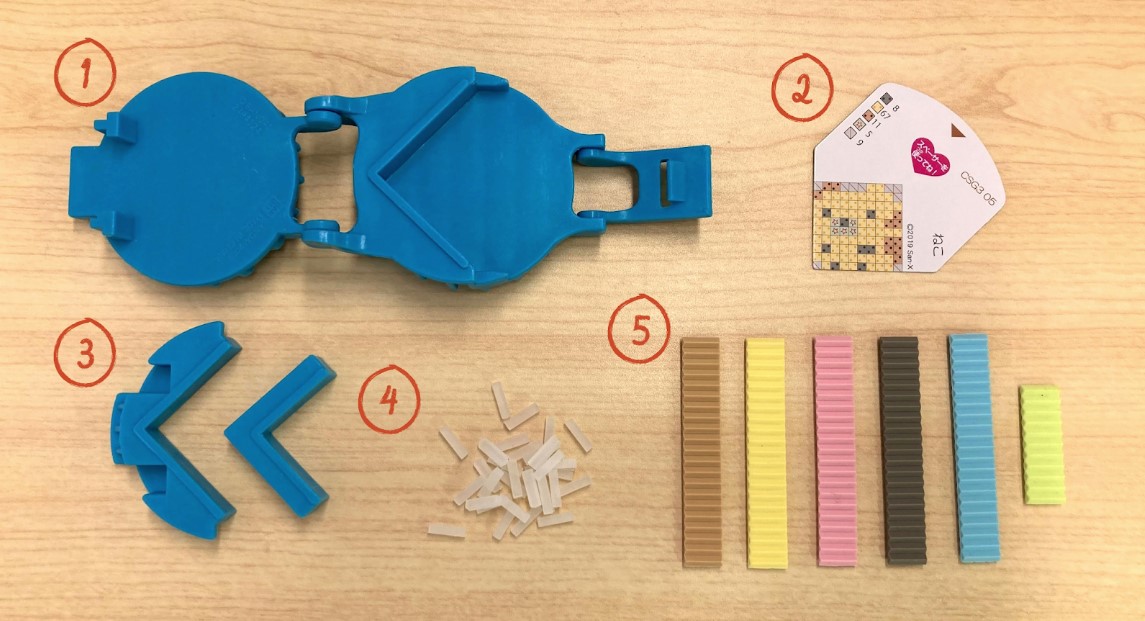
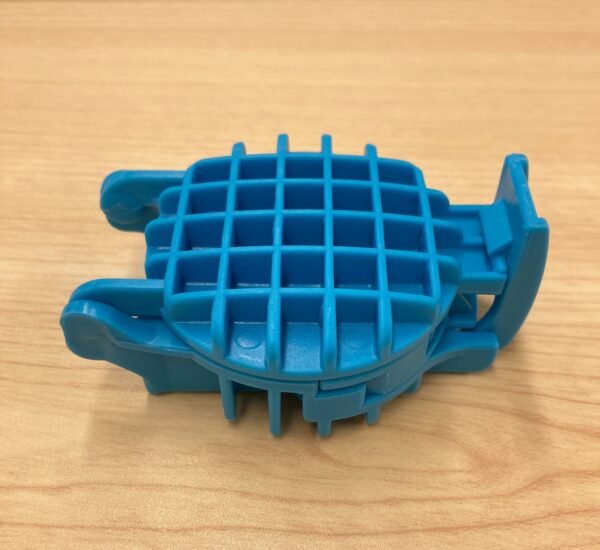
- The Waffle Iron
- Ok, it’s not actually called that in the official instructions, but it REALLY looks like a waffle iron, so that’s what I’m calling it for the purposes of this article. Essentially, it’s the holder you use to line up the eraser sticks, and how the unfinished eraser gets held together in the microwave.
- Design Sheet
- Every Orikeshi kit comes with a set of design sheets for you to follow, indicating what color eraser sticks to put where, and whether or not you need the spacer. For this article, I tried out designs from the Sumikko Gurashi Orikeshi set.
- Spacers
- For the smaller designs (up to 10 x 10), you’ll need to fill the extra space with both spacers, so your design is nice and snug in the waffle iron for microwaving. The larger designs (up to 13 x 13) only need the larger piece on the left.
- Miracle Sticks
- Yes, these really are called miracle sticks. These are special eraser sticks that don’t melt together in the microwave, allowing you to create more complicated shapes than just simple squares. The best part is they’re reusable!
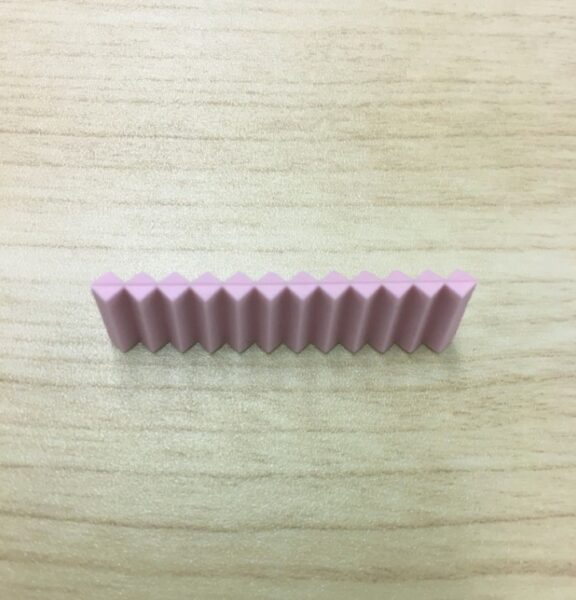
- Eraser Stick Sheets
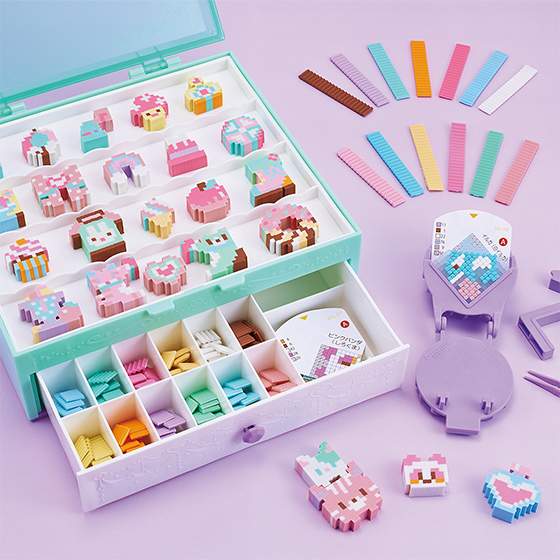
- These sheets are the sticks you use to create your designs. Each sheet has 21 sticks, and they come in over 30 different colors, including special color-changing and glow in the dark colors!
The Basics, Step-by-step
The first step to making your own eraser is to choose a design and place it in the waffle iron. For my first attempt, I chose the Neko design.
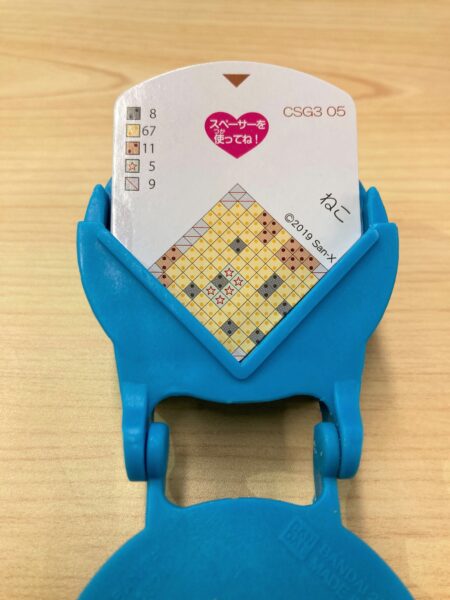
On the left hand side of the design is the list of colors used in the design, and how many sticks of each color you’ll need. The symbol at the bottom with the slash through it is the symbol for the miracle sticks. The heart icon in the middle is telling us we’ll need the spacer for this design.
Once you’ve chosen a design, it’s time to start lining up the eraser sticks over the design sheet. You’ll start building your design with the very bottom corner pixel, then move up row by row.
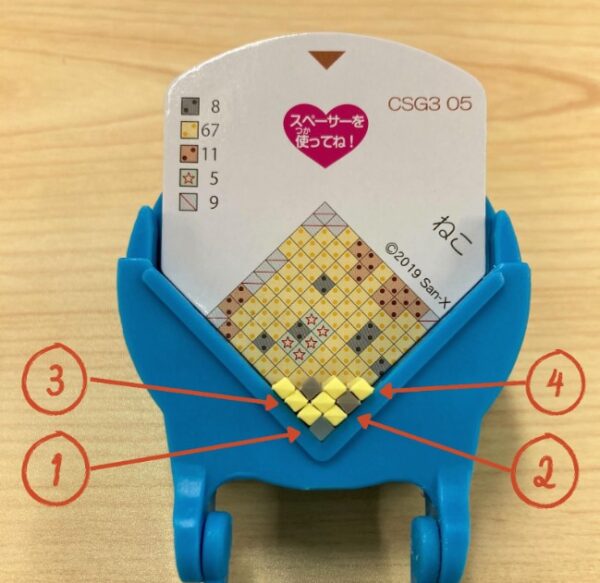
Some kits include tweezers, but honestly, I found it easiest to just use my fingers most of the time. The tweezers do come in handy for if one of the sticks falls over, and you have to pick it back up without disturbing the already-placed sticks.
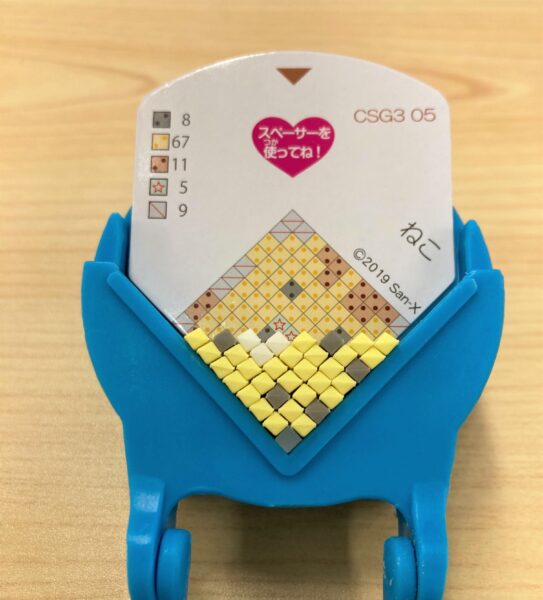
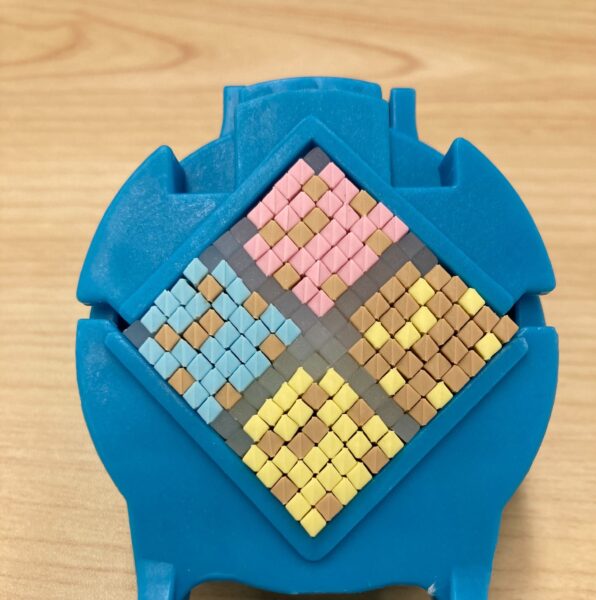
Halfway there….
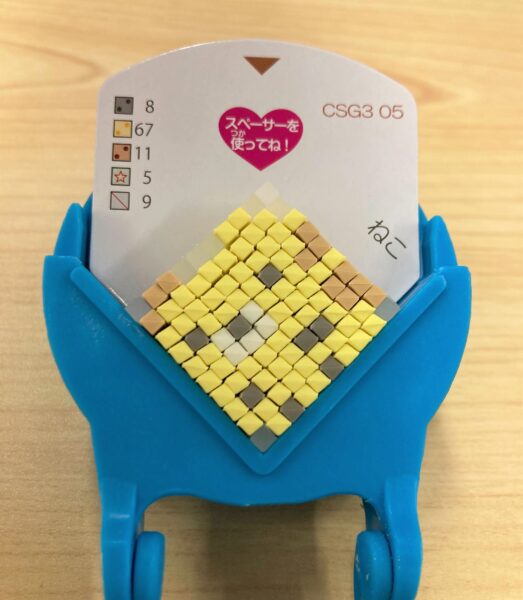
Done!
Now, it’s time to prepare your design for the microwave.
First, you’ll place the spacer (if necessary), and the 2nd piece of the waffle iron. Do this BEFORE you remove your design sheet, otherwise you risk ruining all your hard work!
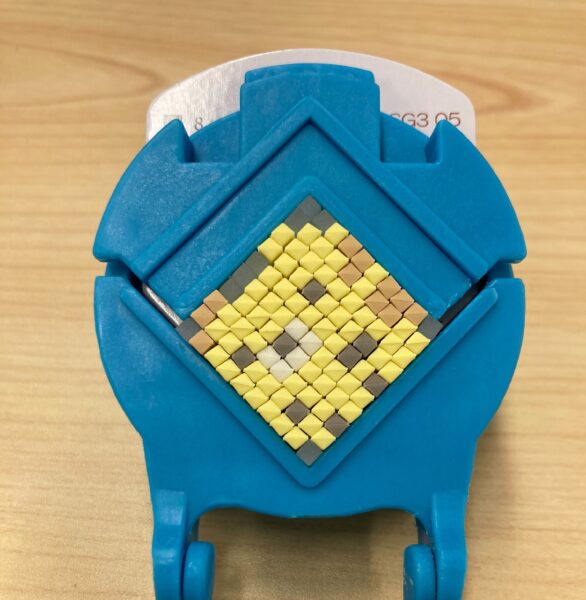
Once the spacer and the 2nd piece of the waffle iron are placed, you can gently slide out the design sheet.
Next, you’ll need to moisten your design with some water. Just dipping your fingertip into water and dabbing it on a few times is enough, no need to drown it. Finally, close the waffle iron, and it’s ready to cook! Make sure the latch clicks into place, so that your design is held together nice and tight! It may take a bit of pushing to get it completely closed.
The instructions say to microwave your design for 80 seconds, at 500 or 600 watts, depending on your individual microwave. If you have a standard microwave, place the waffle iron in the center. If you have a microwave with a rotating plate, you should place the waffle iron closer to the outside of the plate, so that it moves around the microwave as it cooks.
For the first try, I went with 500 watts, mostly because I was scared the whole thing might blow up in our office microwave, and that would have been unpleasant for everyone. Thankfully, my fears were unfounded.
Once the microwave is done, take out the waffle iron and put it in a bowl of cool water for a few minutes to set the eraser. Don’t worry, the waffle iron will only be slightly warm, so you won’t burn yourself!
Now for the moment of truth. Dry off the waffle iron, open it up, and pull out your nifty new eraser! Be sure to remove any miracle sticks used in the design and save them for the next eraser.
Here’s the final product!
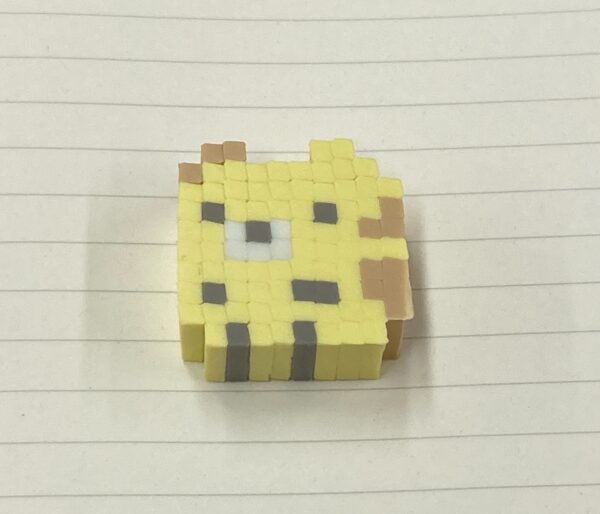
As you can see, the eraser sticks are slightly diamond-shaped, rather than perfectly square. The degree of squareness also seems to depend on the individual eraser stick sheet, as I found some sheets to be much more square than others. This is my ONLY criticism of Orikeshi! I think if they could find a way to make all the eraser sticks perfect squares, the erasers would come out looking just slightly better.
After my first attempt, I went on to make the Tonkatsu design, the Ebifurai no Shippo design, as well as the Tapioca designs.
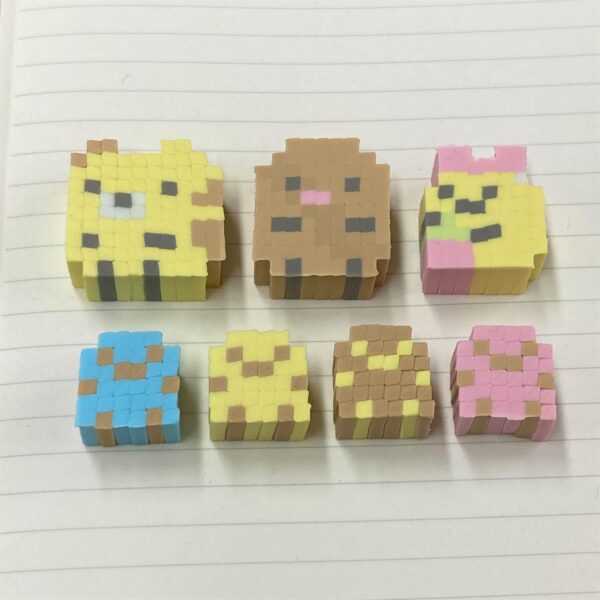
For these, I decided to up the microwave to 600 watts, to see if it would make a more uniform looking eraser. It did help a little, but as you can see, the change wasn’t 100% necessary. Your results will depend on your individual microwave, so don’t be afraid to play around until you get a good result!
Ok, so they’re super cute, and that’s great! But how well do they actually work as erasers? Great、 actually!
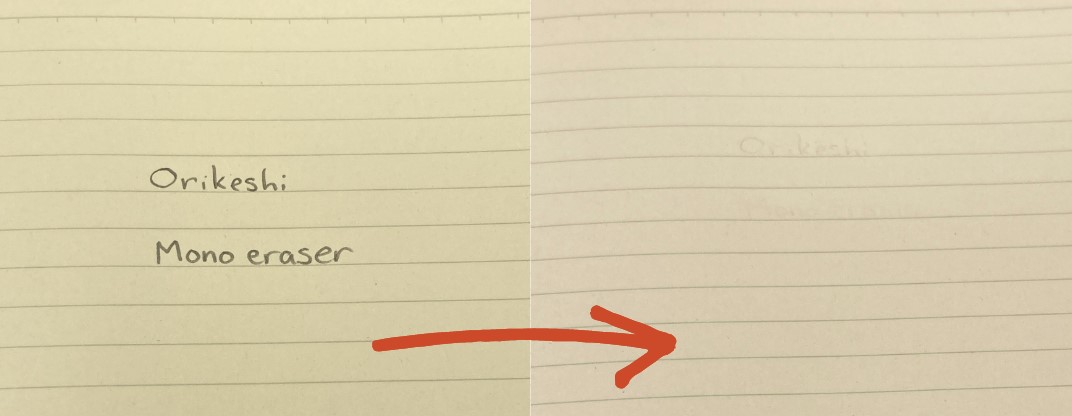
As you can see, while a normal Mono eraser works just slightly better, you’d have no problems actually using an Orikeshi eraser to erase things! And don’t worry about the Orikeshi eraser falling apart, all of the ones I made and tested were rock solid.
Tips and Tricks
Now that you’ve got the basics down, here are a few tips and tricks I picked up while making my test erasers.
Tear the eraser sticks off laterally
When tearing off each individual eraser stick from the sheets, I noticed that they came apart most cleanly when torn off laterally, rather than when torn like a piece of paper.
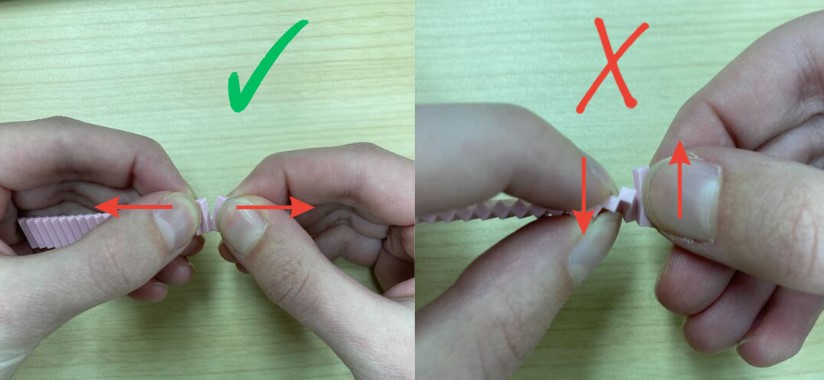
Tearing the sticks off laterally helps ensure each stick is as square and clean as possible.
Place the eraser sticks so the seams run vertically
As you probably noticed in some of the pictures in the sep-by-step section, the eraser stick sheets have a seam that runs across each edge.
I found that when I lined up the eraser sticks in the waffle iron so that the seams all run vertically, rather than horizontally, the sticks fell into place much easier, and created an overall neater looking eraser.
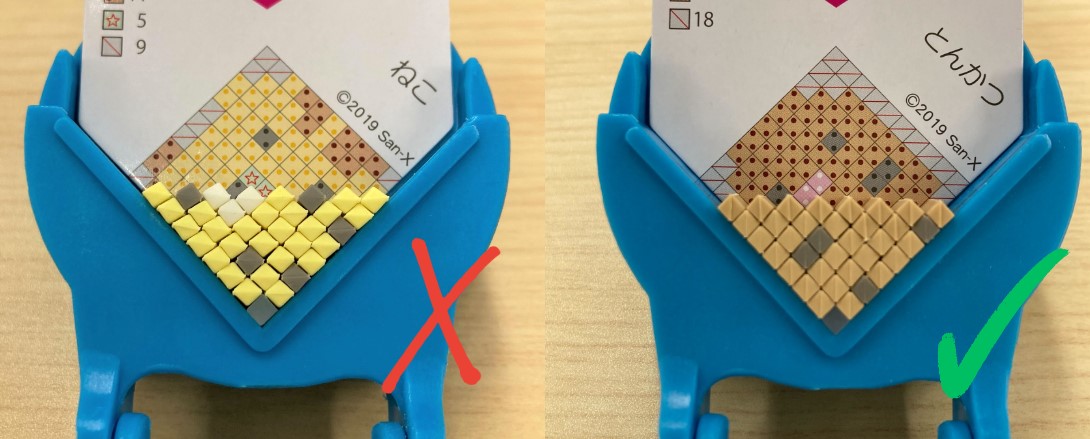
Be careful when closing the waffle iron
When making the Tapioca designs, I made a fatal error just before microwaving. See if you can spot it in this picture:
If you guessed the problem was here, you’re correct!
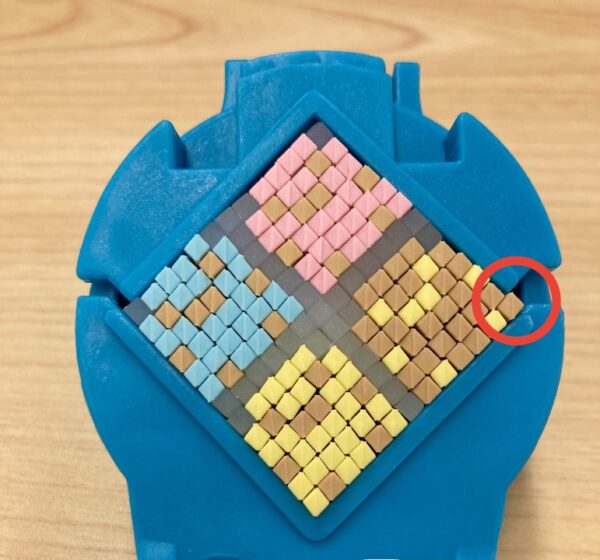
See how that one eraser stick isn’t quite within the frame of the waffle iron? Because of this, when I closed the waffle iron, poor Tapioca’s foot got squished, and melted outside of the waffle iron, into a crazy shape during microwaving. Luckily I was able to save him with some emergency foot surgery, but it’s better to make sure all of the eraser sticks are lined up within the frame before you close the waffle iron!
Overall Impression
I was definitely impressed with Orikeshi as a whole. Like I said before, my ONLY criticism is that the eraser sticks aren’t perfectly square. Even with that small flaw, however, I’d absolutely recommend this to anyone that likes crafts or pixel art, especially kids!
Want to Try Orikeshi Yourself?
There are a ton of different Orikeshi sets available, including Sumikko Gurashi, Demon Slayer, Jujutsu Kaisen, Pokemon, and San-X Characters! Of course, if you don’t necessarily want to make designs of specific characters, you can also try one of their other sets, like their food-themed set, or one of their deluxe sets.
You can also buy refills of the eraser stick sheets in individual colors, so even if you use up all of the sticks in your set, you can always make more!
Finally, check out the Orikeshi website for more info, and be sure to take advantage of the free design patterns available for download!
Let me know what you thought of my first product review! I had a lot of fun doing it, so I would absolutely be open to reviewing other products!
Feel free to submit an order for any of the products featured here (or anything else) via our Request Form.
Not sure how to use our Request Form? Check out our Tutorial Article!
Have a question or comment? Shoot us an email at contact@dejapan.com, or leave a comment below! We’d love to hear from you.